Using FileAssurity
Securing Files & Archives
You can choose whether you want to protect files, sign files, or both by selecting either just a protection key, just a signing key, or selecting both types of key. If 'Not Selected' is displayed in either of the pull-down list boxes then that function will not be carried out. NOTE: Files do not have to be signed in order to be protected and vice versa.
You can also decide whether you want to protect individual files and folders or protect them as a single file (an archive). Please see How do I unprotect a number of files simultaneously and Working with Secure Archives for advantages of each method.
Files may be protected for individuals or multiple recipients.
Securing Files
1. Select the appropriate protection and/or signing key from the æProtect ForÆ and æSign AsÆ drop-down list boxes. If you want to protect files for yourself choose a key that belongs to you. If you want to protect files for other people then choose one of their keys.
2. Highlight the appropriate files/folders in the FileAssurity window or Windows Explorer.
3. Click on the
 button.
Your files are protected/signed and saved to the folder selected in the 'Default Settings' dialog.
Your protected files will be saved using the same name as the original file but with the FileAssurity extension. If you want to save single files to a different name then check the Archive check box (located on the main FileAssurity GUI). You will then be prompted for a filename and location.
Securing Archives
1. Select the appropriate protection and/or signing key from the æProtect ForÆ and æSign AsÆ drop-down list boxes.
2. Check the
3. Highlight the appropriate files/folders in the FileAssurity window or Windows Explorer.
4. Click on the
 button.
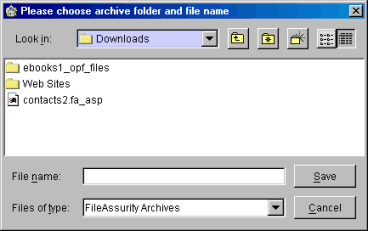
5. A 'Save As' dialog is displayed. Choose the folder where you want to save the archive and enter a filename for the archive.

6. On selection of the Save button your files are protected/signed.
The archive window containing the protected/signed files is then automatically displayed in the right-hand pane. See working with archives.
Protecting files for multiple recipients
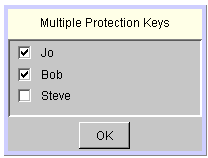
You can protect files for multiple recipients by selecting 'multiple recipients' from the 'Protect For' drop-down list box. The following dialog is displayed:

Check the boxes for the recipients you want to protect files for and then click on the OK button.
NOTE: If you do not include one of your own keys in the list you will not be able to unprotect the file/archive. Before protection takes place you will be asked to confirm the operation.